Report wizard
Reports > Report wizard
Reports are created as templates with the Report wizard. Also, existing templates can be edited here.
This assistant consists of a sequence of windows that provide a number of settings to configure a report:
-
The first window welcomes the user. Click the Next button to proceed with the creation of a report.
-
Scheduled report (displayed only if the type of report is Role-based, chosen in previous step)
-
The last window is displayed to tell the user that the process of creating a report is finished. Click Done to be able to continue with the View reports form, where the report you just created (or any report you have access to) can be run.
Records to include
This window is used to select the tables affected by and triggering the rule.
Select a table from the drop-down
Main table (this is the table that contains the records you want to include in the report as primary information) . Note that the table you selected appears now in the Table hierarchy list box.
Click the Next button if you want to continue adding the fields from this table only. But if you wish to include records from other tables too, that have a relation with the main table (read more about relations between tables here), choose either:
-
The Reverse relations option, to display existing child tables of the one you previously selected as main table,
-
The Record relations (i.e. direct relation), to display existing parent tables of the main table selected.
Note that any relation is displayed in the Available relations list box. Reversed relations are displayed as the name of the child table followed by the name of the field that targets to the main table, in parentheses (e.g. "Order(→Customer name)"); while direct relations are displayed as the name of the field that targets to the parent table only (e.g. "Customer name").
To add a relation, either double-click an entry in the list of available relations, or by highlighting one or more fields in this list and then clicking the left arrow, to pass it to the Used relations list box. After adding relations, note that they are shown in the Table hierarchy list, where reversed relations are shown as bold. The order in which the relations are added does not matter. This window is only used to state the relations that should be visible in the report. The actual appearance of the report is adjusted in subsequent windows.
|
It is possible to add more than one direct relations, but only one reversed relation on the same table. A message will pop up warning this in case there is an attempt. |
To add a relation of a table related (i.e. relations as cascade or on several levels), click on the related table that appears in the Table hierarchy list (note that the table selected is set as red), and follow the previous steps (choose a type of relation, select it and add it).
|
Several levels of related tables can be included in a report. This will be clearly shown with indentation per level in the Table hierarchy list. |
|
Be aware that adding a reversed relation (i.e. a child table), implies that one record of the main table can generate more than one row in the report. For instance, if a record of the main table "Customer" is related to 5 records of the table "Order", the report will show five rows too: Row 1 - Customer "ACME" / Order "1" Row 2 - Customer "ACME" / Order "2" And so on. |
|
Changing the Main table drop-down will reset all previous configuration. |
To remove a relation, click the appropriate table/relation in the Table hierarchy list (one level above the relation to be removed). Then, the relation is removed either by double clicking it in the list of Used relations, or by selecting one or more relations in this list, then clicking the right arrow.
An additional setting can be applied in this window, the Macro/transform drop-down: an existing Report macro file can be selected when configuring a report. The selected file is automatically used as an Excel template when the report is run. Naturally, this has no effect if the user decides to generate the report output file in a format other than an Excel file.
Click the Next button.
Fields to include
This form is used to choose which fields to include in the report.
Select a table in the Table hierarchy list box to display its fields in the Available fields list box. If no table is selected, the fields of the main table will show by default. To easily find fields:
-
Filter by field type in the drop-down above this list, and/or
-
Click at any position of this list, and then press a key in your keyboard, e.g. by pressing "T", the selection will take position all the way down of the list, where fields starting with "T" are.
Double-click the desired fields to add them into the Selected fields list box. You can alternatively select several of them, and add them with the left arrow. The order of the fields in this list is the order in which the fields are presented as columns in the report.
To set the order of the fields, select one by one and use the up and down arrows at the left of this list.
The checkbox Use for filtering only, at the bottom of the Available fields list, is used to select fields so that they are use only for filtering, but not displayed in the report. If this checkbox is ticked when a field is added to the Selected fields list, the field is shown in this list within angle brackets, and will not be displayed in the report. If you forgot to tick this checkbox before adding the field, you can still set the same function selecting the field in the Selected fields list and clicking the Hide setting at the top of this list. If you want to reverse this function, click the field in brackets, and then the Show setting.
|
If no fields are included, the report will only show the record name of the main table and the record names of the reversed relations. For direct relations no record name is included by default, so you can either add the Relation field of the main table, or add the Record name (system defined field) of the relation. |
|
If File fields are included, try the File export feature to download the files stored in those fields. |
Click the Next button.
Sorting
This window allows the user to decide how the items are sorted in a report. The list at the right contains the fields available for sorting. The list on the left side contains the fields on which the report will be sorted. The report is automatically sorted on main record name, ascending. If more than one field is selected, the report is sorted on each of the selected fields, and the topmost field in the list has the highest sorting priority.
Double-click a field in the list box at the right. You can alternatively select several fields and add them with the left arrow.
|
The Sorting windows also displays check-boxes to optionally show in the report a total summary (in addition to, or instead of, a list of records), and to include in the report a date-span summary by week, month or period. |
Click the Next button to continue.
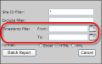
Filter
This window is used to add filter criteria to the report. There are three different ways to create a filter: a field can be compared with the value of Absolute, Other field or Keyword. All fields that can be used for filtering are shown in the list at the top left of the form. A drop-down above the list allows it to be narrowed down to the fields of one specific table.
Click a field in the topmost list box. Choose an option as comparison method:
-
Absolute. An absolute filter compares a field value with a user-specified input value. For example, MyDrop-downField = Item1, MyNumberField > 3, MyDateField ≤ 01-01-2015, etc.
-
Other field. The value of a field is compared with the value of any other field (of the same type) listed in the box of fields to choose from. The user selects the other field with which to compare from a drop-down. This is useful, for instance, when working with Date fields. For example, MyDateField1 = MyDateField2, MyDateField1 > MyDateField2 + 2 days, etc.
-
Keyword. A standard keyword that can be used, depending on the type of field. The keyword MISSING will include in the report those records that have the field in consideration as empty, i.e., that has no value. For fields of Date type, the keyword may also be TODAY, LAST MONTH, THIS MONTH, LAST WEEK, etc. For example, MyDateField = LAST WEEK + 2 days, MyDateField = NEXT WEEK - 2 days (note that days are added from the last day of the week/month, and subtracted from the first day of the week/month). This type of filter may result in a different report, depending on the day on which the report is generated.
In either case, type or select the value after the operator (=, ≠, etc.), which will act as criterion.
Tick the Editable filter checkbox, to have the possibility of changing the filter criteria precisely before run time (i.e. the filter is flexible), displayed in the Run report pop-up form previous to the Report queue form (see below, where "Status"= * is an editable filter, before running the report). Otherwise, the filter will still be applied, but not shown in this pop-up form.
Click the Add filter button to add the filter to the report. The filter is displayed in the list in the lower part of the form.
Additional filters may be added in the same way, since multiple filters can be combined by using the operators AND and OR. The AND operator has the precedence over the OR operator, and is evaluated first.
Click the Next button.
Rename headings
Here you can customize the report headings. The default headings of the chosen fields are shown on the left side of the form. The custom headings are shown on the right side, and can be edited.
Edit the text boxes for the custom headings if necessary. For example, a field named "Serial no" can be edited to "Equipment serial no", which may sound more explicit once presented as column on the report.
Click the Next button.
|
When a user creates a report, the headings in the report (including record and field names) will be displayed in output report files in the language set in this user account’s current settings. Users with different language settings who run the report at a subsequent time will still see the report in the original language in which it was created. If an application needs to generate multiple reports with similar contents but with headings in different languages, multiple reports must be created, each one by a user with the desired language settings. |
Type of report
This window is only visible if the Create role based/scheduled access right is granted to the Report wizard in the Form rights form. Read more about report access rights.
Choose what type of report you want to create:
-
Private/Group report.
Visible only to:
-
the user who created it, or
-
the group (i.e. a group that puts together different user's roles) the user shares the report with (configured in the Report group admin form, note that users having any role in this group will be able to access this report), or
-
all users, i.e., public.
These options will be assigned in the next window in the Report access group drop-down, enabled by the Personal report or Shared report option, and <Public report> or <Group> available for the latter option. Note that the sections below are disabled. Click Next to continue.
-
-
Role based report.
A role-based report differs from group report in that:
-
It provides the possibility of scheduling the report, and receive a notification when it is ready (set in the next window).
-
Only users who have all the roles specified in this window will be allowed to download the report, scheduled or not, from the Report queue form. If the report is not scheduled, these users will also be able to run it from the View reports form. In case multiple users attempt to run the same role based report within a certain period of time (usually 4 hours, set by the server administrator), the report is executed only once by the first user, providing to subsequent users who try to run the report a link to download it. The report can be executed again after that period of time has passed.
Example: The role based report "Delivered units" is granted to the "Manager" and "Team leader" roles. USER1 only has the "Manager" role, and is not able to view, run or download the report. USER2 has both roles and has access to the report. USER3 has roles "Manager", "Team leader" and "Coordinator", and has access to the report. USER4 has "ADMIN" role and also has access to the report, since he/she is granted the View all reports and Show all users rights for the View reports and Report queue forms, respectively, which bypass the roles specificied here. USER2 runs the report and downloads it. 30 minutes after that, USER3 tries to run it, but she gets a link to download the already generated report.
Once the Role based report option is chosen, select the desired roles and add them by using the left arrow. Click Next to continue.
-
Scheduled report
Note that this window is displayed only if the type of report is Role-based, chosen in the previous window.
Select either Not scheduled or Scheduled report.
|
It can be very useful to schedule the execution of a report at non-rush office hours. Otherwise, to generate, for instance, a heavy report during work hours could lead to disrupt the users' other reports and perhaps affect the general performance of the application. Instead, scheduled reports are generated between 2am and 3am to avoid such a disruption (after Scheduled imports), on a given date or interval of execution (e.g., daily, monthly, etc.) |
If scheduled, choose the output format for the report, and choose the recurrence of the report execution:
-
Once: The report executes only once, on the day specified in the Date box. Run-once reports are executed after all daily, weekly and monthly reports.
-
Daily: The report executes once a day, within the time interval indicated in the form. This time cannot be configured by the user. Daily reports are run before run-once reports.
-
Weekly: The report executes once a week, on the weekday selected in the Weekday list. Weekly reports are run before daily and run-once reports.
-
Monthly: The report executes once a month, on the day specified in the Day of month text box (the desired day must be specified as an integer), or on the Last day of month (which takes into account the actual month length) if this checkbox is ticked, and removes any text typed in the Day of month text box. Monthly reports are run before all other scheduled reports.
|
If you enter a Day of month past the actual length of the month, the report will be executed on the actual last day of the month. For instance, a report is scheduled to execute the 30th of each month. In February, this report is executed (depending on whether the current year is a leap year) either on the 28th or on the 29th. |
Note that this schedule might be modified during the daylight saving time (DST) change (the report will not be run if scheduled as Once, but will be run the next time instead if scheduled as Daily, Weekly or Monthly for the Spring adjustment, and normally run for the Autumn adjustment), or during possible server downtime (the report will not be run if scheduled as Once, but will be run the next time instead if scheduled as Daily, Weekly or Monthly).
A notification (i.e., e-mail) can be issued after completion of the report. If you do not wish any notification, select the No notification option.
Otherwise, choose Notification to creator (this setting is only available for scheduled reports) or Notification to all recipients (whose roles are selected as part of this report). Then, type a Subject (maximum 60 characters), a message in the Text box (maximum 500 characters) and the Importance of the notification (these settings are only available for a scheduled report).
|
Scheduled imports are run before scheduled reports. Therefore, any data imported with a scheduled import becomes immediately available to a scheduled report, and may alter the results of this report. |
Remember that only users who have all the roles specified in this Role-based scheduled report will be allowed to access it.
For now, click Next to continue; but once the scheduled report is fully configured in this wizard, you can go to the Scheduled report queue form to check out the detail information of the schedule.
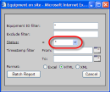
Report information
Type the Report name and its Description, and apply any of the available settings:
-
Show duplicate data: Displayed only for classic reports. This checkbox is used to choose whether duplicate data is shown in the report. This setting is only applicable when the report contains at least one reverse relation. As stated earlier, a reverse relation can result in more than one subordinate record per main record. If this is this case, the report may contain redundant data if the checkbox is checked. Note that the summary is not affected by this setting.
-
Hide empty records: Displayed only for classic reports. If this checkbox is ticked, the records that contain empty values for all of the fields included in the report will not be shown in the report.
-
Hide record name: If this checkbox is marked, the record names of the main records are not shown in the report. This is useful if the records have names that do not mean much to the user (for instance, generated series as record names).
-
Enable links: When marked, links for record names and relation fields are enabled in the report if this is generated in HTML format. When such links are clicked, the default form for the table is opened in the main browser window. The above works only if the user is logged in, if the main window is still open, and if a default form for the table is defined. These links should not be confused with fields of type Link that are always enabled in HTML reports.
-
Separate sheet for report information. This checkbox controls whether report information is placed on a separate sheet in the Excel file.
-
Create new. This checkbox is only displayed after a report has been saved (e.g., when editing an existing report). Ticking it and entering a new Report name while editing a report causes the edited version to be saved as a new report with the selected name. This is useful when an unchanged version of an existing report should be kept, together with its edited version. Note: Editing the Report name without ticking the Create new checkbox only renames the report being edited, without saving a new copy of it.
-
Enable timestamp filter: Displayed only for classic reports. When this checkbox is ticked, a system filter is displayed as two date boxes (Timestamp filter From/To) in the Run report pop-up form, precisely before run time, where the user enters an interval for filtering the fields presented in the report based on their timestamp (the timestamp is a system date field -according to server time-, that each field created for the application counts with. It is automatically updated every time a particular field value is entered or edited and saved). It is important to highlight that the timestamp filter does not restrict the range of records included in a report, but only the range of their fields. Other filters, instead, include in the report or exclude from the report the whole record. In other words, if a timestamp filter is used, fields with timestamps outside the range specified in the timestamp filter are never included in the report. The records that contain these filtered-out field values, on the other hand, are still included in the report (unless subsequently excluded by any other filter). This is a very special option that can be useful to include in a report if, for instance, you want to audit which fields of records were entered or updated in the time interval specified.
|
Owing to the fact that the timestamp filter is only applicable to include fields, it is recommended to use this option without other kind of filters, e.g., editable filters, since the latter ones include/exclude records, so mixing both could cause a confusing result for the user running such a report. Note that a deleted value will be presented as empty. A special case is the checkbox field, where False technically is treated like an empty value. Thus, only checkboxes that ar ticked (but not unticked) within the time range will be shown (as True). |
|
At present there is no exact equivalent of the timestamp filter for operating on records, rather than their fields. However, a comparable functionality can be implemented by manually creating a filter that checks the value of the system defined field called Record updated. |
-
Force one main record. When ticked, the user queuing the report is prompted to a system filter in the Run report pop-up where one record name of the main table must be specified. This is a mandatory choice (i.e., it is not possible to leave the record’s name box empty). Once this is done, the report is queued, and the generated report file will contain only the selected record, and all the related records that are setup in the report configuration, if available.
The remaining options are enabled only if the option Private/Group report was chosen in the Type of report window of the current wizard.
-
Personal report: The report will only be visible to the creator of the report. Consequently, personal reports can only be viewed, edited or deleted by whoever created the report (and by the administrator of the application).
-
Shared report: It means that the report will be accessible to all users (note that the Report access group drop-down, below this option, is set as <Public report>) or accessible only to a certain group of roles (if such a drop-down is set to a group). These groups are created and edited in the Report group admin form. This setting is only enabled if the Create public access right is granted. Read more about report access rights.
Click the Next button.
|
Note that edition of multiple reports at the same time using different tabs/windows under the same login session is not supported. |